Cloudflare is a leading CDN (Content Delivery Network) and website security service, offering numerous useful features, including DNS management, free SSL, and efficient parked domain support. This guide will walk you through the detailed steps to set up a parked domain and automatically activate SSL on Cloudflare.
Step-by-step Guide:
Contents
Step 1: Sign Up and Log In to Your Cloudflare Account
- Sign Up: If you don’t have a Cloudflare account yet, please sign up here: https://dash.cloudflare.com/sign-up and complete the registration process.
- Log In: Once you have an account, log in to your Cloudflare dashboard.
Step 2: Add Your Domain to Cloudflare
- In your Cloudflare dashboard, locate and click on “Add a domain”.
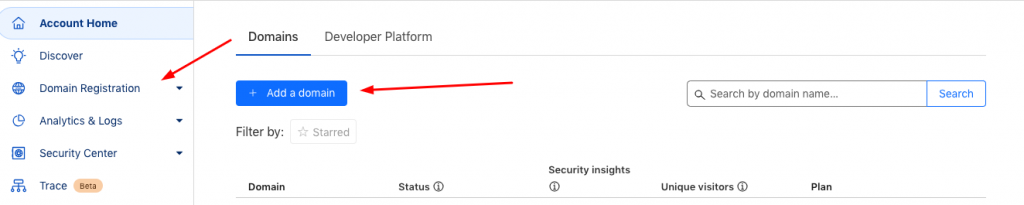
- Input your domain name, for example: probuy.asia.

- Cloudflare will automatically scan your existing DNS records. However, sometimes these records might not be accurate. We recommend that you enter your DNS records manually to ensure correctness.
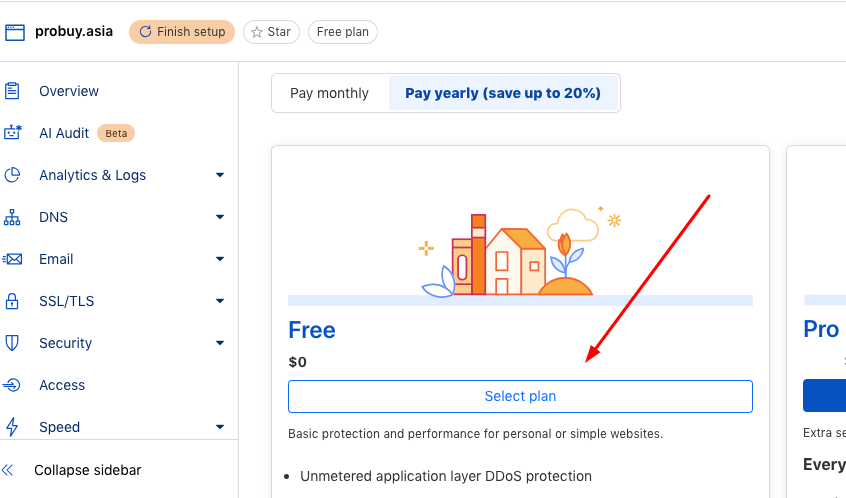
- Select the “Free” plan option that Cloudflare supports.
Step 3: Input Your Current DNS Records
- You will need to input all of your domain’s current DNS records into Cloudflare.
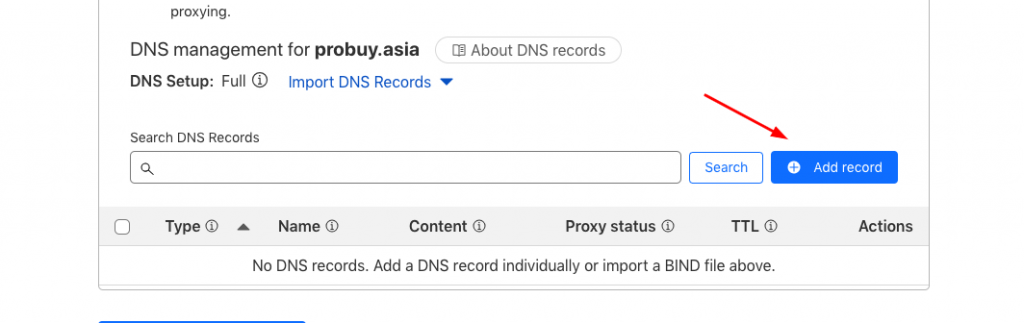
- To know your current DNS records: Log in to your current domain provider’s management dashboard (for example, PA Vietnam if probuy.asia was bought from them).
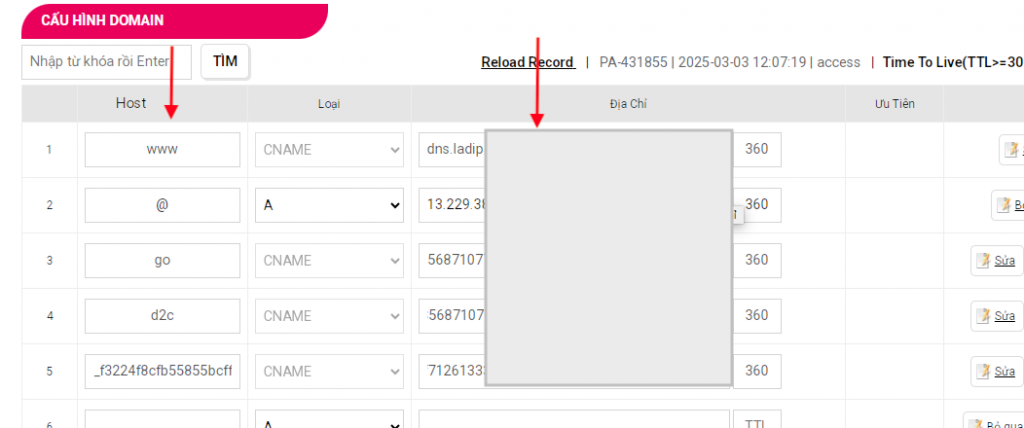
- Copy each DNS record (e.g., A, MX, TXT, CNAME) from your current domain provider dashboard to the Cloudflare dashboard. Ensure you copy them completely and accurately.

Step 4: Set Up Your Parked Domain
After finishing copying all your current DNS records, you can begin to set up your parked domain. To have your parked domain work with your linked service (e.g., renlinks.com), you need to create or modify CNAME records pointing to renlinks.com.
- For the root domain (full domain) (e.g., probuy.asia):
- Type: CNAME
- Name: @ (or your root domain, e.g., probuy.asia)
- Value: renlinks.com
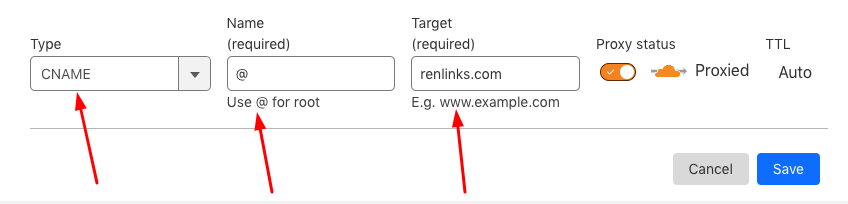
- For the www domain (e.g., www.probuy.asia):
- Type: CNAME
- Name: www
- Value: renlinks.com

- For a subdomain (e.g., click.probuy.asia):
- Type: CNAME
- Name: click
- Value: renlinks.com

Note: Ensure the orange cloud icon next to each CNAME record is enabled (proxied) for Cloudflare to process traffic and apply security/CDN features.
After finishing adding/modifying your records, click “Continue to activation”.

Step 5: Update Your Nameservers
This is a pivotal step for transferring DNS management control of your domain to Cloudflare.
- Turn off DNSSEC (if enabled): Go back to your current domain provider’s management dashboard and turn off their DNS security (DNSSEC) setting if it’s on. Cloudflare’s DNSSEC will work after you change nameservers.
- Change Nameservers: Remove all your existing Name server records and set up new name server records from Cloudflare.
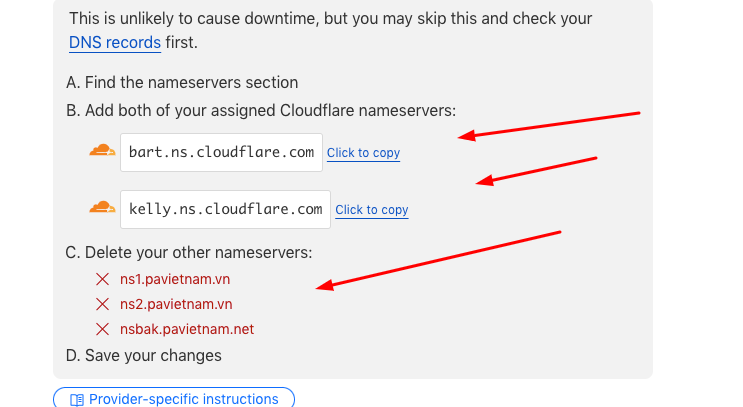
- For example, here is PA Vietnam dashboard after removing their name server record and changing to Cloudflare name server record
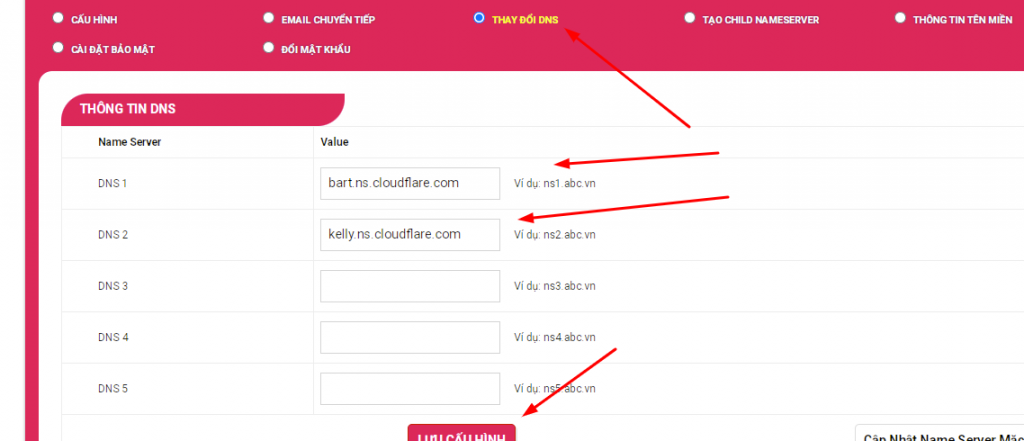
- Save Changes: After updating the nameservers, save the settings on your domain provider’s dashboard.
Step 6: Activate the Domain on Cloudflare
- After finish changing the nameservers record, go back to Cloudflare and click “Continue“.

- Click “Check nameservers now” to see the result.
- This process may take some time, sometimes up to 24 hours, for nameservers changes to propagate globally.
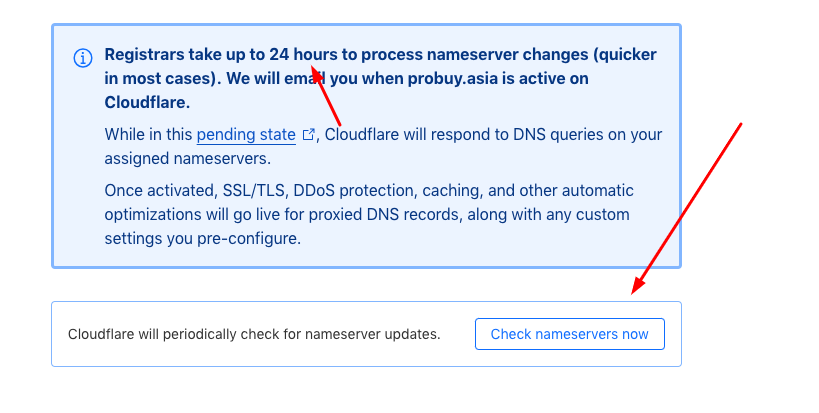
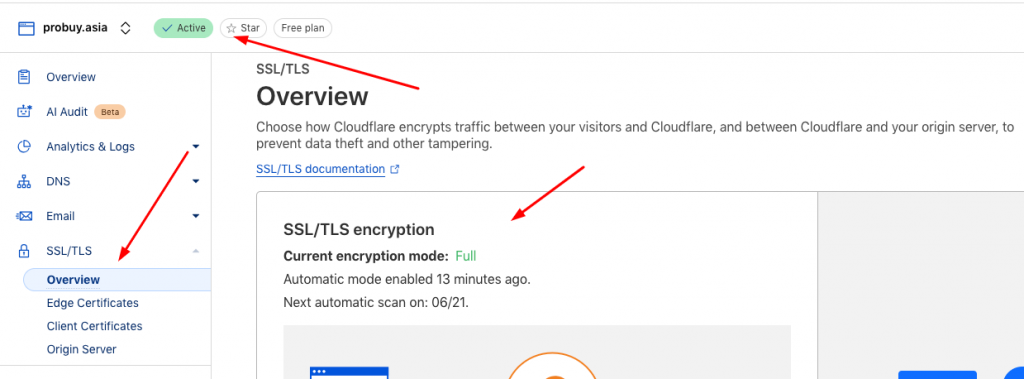
- When your domain in Cloudflare is active, its status will change, and the SSL (Secure Sockets Layer) will be active automatically for your domain. Cloudflare provides free SSL (Flexible SSL or Full SSL depending on configuration), making your website secure and better ranked by search engines.
Congratulations! You have successfully set up your parked domain and SSL on Cloudflare. Your domain is now protected and optimized by Cloudflare, and can securely point to your parked domain service.
Watching another tools at Rentracks DashBoard: How to Setup CONVERSION API on GOOGLE ADS (RENTRACKS WEB APP)